Wednesday, 10 October 2007

Pretty Little Cupcakes


Recently I bought some cute little cupcake decorations so decided today was the day to make cupcakes..plain, old vanilla ones with a buttercream frosting...none of the fancy schmancy cupcakes you see in other peoples blogs, or blogs totally dedicated to cupcakes. Don't get me wrong, they are awesome!!!

I just wanted to get back to basics and make something simple!!

This is the recipe I used, I didn't have to change a thing and they worked out perfectly, so I recommend this recipe from http://www.thejoyofbaking.com/ they tasted very yummy too... ;)

Thursday, 4 October 2007

Creamy bacon and garlic pasta


This was a quick lunch I prepared for the kids and I - very basic but yummy at the same time.


This is the recipe (hello Mel, hope you are taking notes LOL!)


drizzle of olive oil

4-5 rashers of bacon, diced finely

3 cloves of garlic, minced

1/4 C white wine or chicken stock

150g light sour cream

1/4 C milk

2 tsp plain flour

2 Tb fresh grated parmesan cheese

sea salt

cracked black pepper

250g pasta (I used elbow macaroni)


Drizzle a bit of olive oil into a pan and add the diced bacon, stirring to avoid sticking, once it starts to brown, add minced garlic and stir until aromatic.

Deglaze with some wine or stock, allow liquid to reduce and add sour cream.

Stir flour into the 1/4C of milk, and add to the sauce (this is to thicken the sauce)

Simmer until thickened, add fresh parmesan, S&P, stir through cooked 250g of pasta, add extra parmesan and cracked black pepper to serve!


As an afterthought I thought you could probably add some grated zucchini, or spinach, mushrooms of course and maybe even some corn to the sauce for some extra colour and veg..Anyway..hope it turns out as well for you Mel as it did for me!

Tuesday, 2 October 2007

Quick Fried Rice - chop! chop!


When I make my fried rice, I like to use jasmine rice as I really like its fragrance! I make the rice early on in the day and then once it has drained well, I refrigerate it uncovered so it can dry out somewhat, and become nice and cold..THIS is the secret to a good, homemade fried rice!

Another tip I'd like to share is, with the eggs, I like to add a ½ teaspoon of turmeric to them before making an omelette with them. This gives them a nice extra yellow colour. It is mainly just a visual thing - but thought I'd share the tip anyway! I LOVE food that LOOKS good, as we all know, food isn't just about the taste, it involves all the senses.

I also make a large amount, as it is great as leftovers/lunch the following day, in fact, I find the flavour actually improves.

2 C jasmine rice
4 eggs
3 Tb vegetable oil
4 bacon rashers, chopped
2 carrots, peeled and finely chopped
4 shallots, trimmed, finely sliced
1/2 cup frozen peas and corn, thawed
3 Tb soy sauce, plus extra to serve

Cook the rice in a large saucepan of boiling water for 12 minutes or until tender. Drain, refrigerate until required.
Using a whisk, lightly beat eggs in a small bowl, adding ½ tsp of turmeric to enhance the colour. Heat oil in non-stick wok or large frying pan over medium heat. Add eggs. Swirl over base to form an omelette. Cook 2 minutes. Turn over. Cook 2 minutes until set. Transfer to a chopping board. Set aside to cool slightly. Cut into short strips.
Add bacon to wok. Cook 4 minutes until light golden. Add carrot. Stir fry 1 minute. Add shallots, peas and rice. Cook, stirring, 3-4 minutes. Add egg and soy sauce. Stir until heated through. Serve immediately, with extra soy.

You HAVE to try this!!


Next time you are wandering about the spice aisle in your local supermarket, try and see if you can find this product..
It is called "Table of Plenty" Spanish Spice Rub and ooohhhh boy, it is just delicious. It is presented in a cute little brushed aluminium box cube and cost me under $3.00 and looks so funky sitting amongst my spice rack.
It contains spanish smoked paprika which has the most wickedest flavour...I made some t-bone steaks for our dinner last week sometime, and I rubbed the meat with some olive oil, sea salt and cracked black pepper and then massaged some of this spice rub into the meat prior to cooking.

The entire kitchen smelt so exotic and spicy, we couldn't wait to tuck into our steaks, and they were so nice and tender!

So, try and find this product, I highly recommend it!

Classic Pancakes


Lennon requested some pancakes the other day, so I looked for a quick and easy recipe on the internet and this one seemed really good, the kids gobbled them down quick smart. I think pancakes or pikelets make such a great little treat for the kids, because they do not have any preservatives in them or anything particularly bad if eaten in moderation, and they can wander about eating them (without any jam etc on top) and they drop no crumbs so are relatively mess free.

Here is the recipe I used.

Tuesday, 25 September 2007

Anna Pavlova


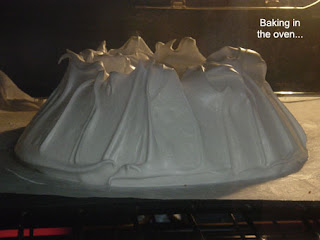
So was it the Aussies or the Kiwis that can lay claim to this delicious dessert that was named in honour of the famous ballerina, Anna Pavlova, who toured Australia and New Zealand in the 1920's?? You can read more about the Pavlova debate here.

Again, my Kenwood Patissier got a good workout, but beating eggies until they form soft peaks is nothing for this powerful machine. I remember years ago, when I first moved out of home (1994) I owned an electric handmixer and even that used to take me eons to make the egg white form soft peaks..but with my darling Patissier, I turn my back on it for 2 minutes, and before my eyes, soft, white, voluminous and billowy egg whites!

So ingredients and quantities, here we go...
6 egg whites
1 1/2 C caster sugar
1 tsp cream of tartar


Put egg whites into your mixer, and beat on high until they form soft white peaks.

At this stage, add 1 tsp cream of tartar, and slowly add the 1 1/2 C caster sugar, the mixture should now have a really dense and glossy appearance.


Line a tray with some baking parchment, and mound the pavlova mixture into the centre, smoothing out until you have a rustic circle, it doesn't have to be all pretty and perfect.


Bake at 150c for 30 minutes and then reduce the temperature to 120c for an hour.


When done, allow to cool in the oven with the door ajar.


Once completely cooled, mound some whipped cream on top and all around and some fruits on top..I used strawberries and kiwi fruit..but you can use banana, peaches, roasted macadamias, carambola or 'star fruit', blueberries, raspberries, passionfruit etc etc etc - let your imagination run WILD!

Pasta Fresca


Felt like making some fresh pasta yesterday, so out with the pasta machine, the flour, eggs and water...a couple hours later, I ended up with some lovely fresh fettucine. There really is nothing quite like fresh pasta.
I used 500g Tipo '00' flour, (which is basically, an extra fine flour imported from Italy which is especially good for pasta making, and I also make my pizza and focaccias with it as well) 6 eggs organic preferably..I use 2 whole eggs and 4 yolks (reserved the whites and made a pavlova with it - recipe and pics for that to follow!) and water.

Placed eggs and flour into the Kenwood Patissier with the dough hook, and mixed it until it resembled breadcrumbs and then added water - just until it all binds together nicely. Then I took it out, and kneaded it until it was smooth and elastic and placed it in the fridge to allow the dough to 'rest'.

Then, just run it through you machine and presto! Fresh pasta...lovely!

Sunday, 23 September 2007

Pizza Pizazz..


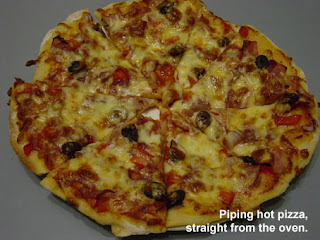
Tonight was pizza night - made my own pastry as usual...I am so loving my Kenwood Patissier..that one item, just makes my life so much easier, and I swear, the quality of my dough, is just SO much better...before it is cooked, it is silken and as soft as a baby's bottom lol and after, it is golden brown and perfecto!


So while the dough was proving, I chopped up some red onions (or spanish onions as some like to call them), red capsicums, kalamata olives, wafer thin salami and some wafer thin honey ham..and a heap of grated mozzarella. For the tomato base, I used some passata, and added to it some freshly cracked black pepper, fresh sea salt, a pinch of both dried oregano and basil - this is how my Nonno used to make his tomato base in all the pizza establishments he has owned. I think he would be very proud of me ;)


I rolled the dough out to a nice rustic circle (I get three pizzas out of my pizza dough recipe) and then swirled the tomato base, sprinkled the onions and capsicums, layered the salami and ham, dotted the gorgeous purple kalamatas around the pizza and lastly, put the mozzarella on top and into a 250c oven for around 12-15 minutes and it is done.


Just served it with a very plain and basic baby salad leaf and herb salad tossed with some balsamic vinegar and good quality olive oil...simple dinner, delicious with a glass of the good stuff...why would you want to eat out?????


Friday, 21 September 2007

Apple Galette - a quick dessert.


'Galette' is, in fact, a French term signifying a flat round tart that can be either sweet or savoury and while this recipe uses puff pastry as a base, they can also be made from yeast risen doughs like brioche, or with a sweet shortcrust pastry.

It is such a quick dessert, you have NO excuse now to make it for dessert, unless that is of course you are on a diet hmmm???


4 (25 x 25cm) puff pastry sheets
2 large Granny Smith apples, peeled, thinly sliced
2 Tb melted butter
2 Tb caster sugar
Honey, to serve

Preheat the oven to 180°C.
Cut four 12cm circles from the puff pastry. Place on a lightly buttered baking tray.
Place the apples, overlapping, on top of the pastry. Brush with melted butter and sprinkle with sugar.
Bake for 20-25 minutes until the pastry is crisp and golden. To serve, drizzle with honey.

Optional : You may also wish to dust the apple galette with some icing sugar and a scoop of french vanilla icecream.

Thursday, 20 September 2007

Chicketti


This is for my friend Mel....I don't know how you usually make your chicketti lol BUT this is my version.

3 skinless chicken breasts, cubed
4 cloves garlic, finely chopped
2 Tb good quality olive oil
1/2 cup white wine or chicken stock
1 can diced italian tomatoes
½ bottle of italian passata (tomato puree)
1 tsp dried oregano
1 tsp dried basil
pinch of sea salt and fresh cracked black pepper

Add oil to the pan, medium high heat, and add garlic and keep stirring around until it is aromatic but do not let it brown or it will go bitter.
Add your cubed chicken to the pan and keep moving it around so it does not stick or burn...
Once the chicken is sealed, add the wine/stock and allow it to reduce a little to enhance the flavour and slowly poach the chicken.
Add oregano, basil, S&P to taste .
Add tin of tomatoes and the ½ bottle of italian passata, simmer for 30 minutes, until chicken is tender and serve through some hot pasta..preferably spaghetti, hence the name 'chicketti' lol..I only had some rigatoni last night.
Garnish with some rocket/arugula or fresh basil...a very simple and yummy dinner!

Friday, 7 September 2007

Tea Time Treat!

Yesterday, the kids and I were really hungry for something to have with tea, and as we need to desperately do some food shopping - well, I think we put poor Mrs Hubbard to shame!
But in saying that, we did have all the basic staples to cook up some tea time treats...so I thought, how about some butterscotch scrolls hey kids? And of course, being ALMOST 4 and 18 months old, they didn't have a clue what I was on about - I just promised them, trust in me, you'll like it! (well I HOPE)
They are perfect with a cup of tea!

30g butter, softened
2 cups self raising flour
3/4's cup whole milk
75g butter, extra, softened
1/2 cup brown sugar
cinnamon - a sprinkle
icing sugar - a dusting, to serve

1. Rub butter into the sifted flour until mixture resembles fine breadcrumbs. Make a well in the centre, add milk all at once and mix to a soft dough. Turn out onto a lightly floured surface and knead lightly.

2. Combine extra butter, brown sugar and a sprinkle of cinnamon.

3. Roll out to a rectangle 1cm thick. Spread with butter and brown sugar mix.

4. Roll up as for a Swiss roll and cut into 12 slices with a sharp serrated knife.

5. Place in 12 x ½ cup muffin pans and bake at 220°C for 10-12 minutes or until golden and cooked.
6. Dust with icing sugar and serve.

Wednesday, 5 September 2007

The Foodie Blogroll

I have just been added to the Foodie Blogroll , created by The Leftover Queen. The blogroll contains an ever growing list of food bloggers like myself. It is great, theres heaps of blogs for us foodies, so much to read and inspire...and you can even join the forums there and meet likeminded people!
So, if like me, you like keeping a food blog, I really encourage you to join!

Spicy Chai Latte

This is sure to put the fire in your belly!
We love to have this and drink in all it's exotic spiciness...very nice and one of my favourite drinks ( besides a good strong coffee...! )


4 tsp loose leaf black (or green) tea
2 C water
thumb sized piece of fresh ginger
6 green cardamom pods
6 black peppercorns
2 cloves
1 star anise
½ C milk
honey or sugar to taste


Place ginger, cardamom pods, peppercorns, cloves and star anise into the mortar and pestle and give them a little crush, just enough to split and crack everything. This will make the flavours infuse better.
Place spices into a little pot with the black tea leaves and the 2 cups of water, bring to the boil on a medium-high heat.
Reduce to medium-low heat and simmer for 5 minutes or until highly aromatic.
Remove from heat.
Now at this stage, I will froth the milk using my coffee machines steam nozzle...but you don't have to froth the milk, still tastes just as good! Add milk to tea infusion.
Strain into two moroccan style tea cups and add sugar or honey to taste.


Photo Sharing and Video Hosting at Photobucket


Photo Sharing and Video Hosting at Photobucket

A Big Ol' Pot O' Soup..

Waking up this morning to grey, threatening clouds - put me in the mood for some soup...any type really, I love soup.

So I went with a minestrone type soup...very nourishing and my daughter loves it, my son though, well he is fussier so what I do for him is, blitz his up so it is a puree consistency and then I cook him up some pasta and it is poured over the top like a pasta sauce. Then, my inner peace is restored - knowing he has eaten a few veggies...ahh kids...and all I can think is, "Hey better than McDonalds!" cacca crap...

Usually, when I make soup with beans in it, I like to soak them overnight, but I always have a few cans of beans ready to go in the pantry too..so this time, I used tinned beans and also, use a tin of good quality, Italian tinned tomatoes...none of this homebrand crap..they gotta be Italian.

1 large brown onion, chopped finely
3 cloves garlic, finely chopped
2 carrots, diced
2 sticks of celery, diced
2 medium potatoes, cubed
drizzle of good olive oil
1½ litres of vegetable stock
1 400g can diced tomatoes
1 400g can of borlotti beans
¼ C peas
½ C risoni pasta (or any other soup pasta)
sea salt flakes (mine is from the Indian Ocean in Western Australia ♥)
cracked black pepper


Prepare and chop all vegetables.

Photo Sharing and Video Hosting at Photobucket

Drizzle some olive oil into your pot.

Add all the onion, garlic and veg and saute for approx. 5 minutes, until veg soften and onion goes opaque.

Photo Sharing and Video Hosting at Photobucket


Add the tin of tomatoes, stirring through and then the S&P and stock.


Photo Sharing and Video Hosting at Photobucket


Photo Sharing and Video Hosting at Photobucket


Bring soup to the boil, and then reduce the heat until it is simmering

Allow to simmer for 30 minutes or until potatoes are soft.

Add peas, borlotti beans and pasta.


Photo Sharing and Video Hosting at Photobucket


Photo Sharing and Video Hosting at Photobucket

Cook until pasta is al dente.

Dish up...I like to serve it with a mound of freshly grated parmesan in the middle and some cute little basil leaves, the hot soup melts the parmesan into a big cheesy goo and then the aroma of the basil just leaves you begging to eat this soup!


Photo Sharing and Video Hosting at Photobucket


Photo Sharing and Video Hosting at Photobucket

Wednesday, 22 August 2007

My new kitchen toys !!

About a month ago now, I went and bought a new Kenwood "Patissier" benchtop mixer...my Sunbeam Mixmaster just doesn't cut it anymore..it couldn't keep up with my doughy demands. I LOVE my new toy!!! And this pretty funky ice cream scoop, I just think it is the cutest thing, don't you??


Custard Yoghurt Cake

This is one very moist cake, perfect for afternoon tea!!


Give it a try, I am sure you will like it. I love the addition of custard powder as it makes the cake nice and yellow and happy :)

  • 150g butter, room temperature
  • 3/4 C caster sugar
  • 1 tsp vanilla essence
  • 2 eggs
  • 1 1/3 C SR flour, sifted
  • 1/3 C custard powder, sifted
  • 1 C plain Greek style yoghurt
  • 1/3 C toasted almond flakes

Icing:

  • 1 C icing sugar mixture, sifted
  • 20g butter, softened
  • 1/2 orange, juiced
  1. Preheat oven to 180c. Lightly grease your cake pan.
  2. Cream butter, sugar and vanilla essence until pale and fluffy.
  3. Add eggs, one at a time, beating well between each addition.
  4. Fold in sifted flour and custard powder alternately with the yoghurt. Stir until mixture is just smooth.
  5. Pour mixture into cake pan, smooth surface.
  6. Bake for 40 minutes or until golden and a skewer inserted comes out clean.
  7. Allow to cool in pan, turn out onto wire rack.

Make icing:

Combine icing sugar, butter and juice in a bowl and stand the bowl in a sink partially filled with warm water to assist the butter to melt. Stir until smooth and drizzle over cooled cake. Sprinkle with toasted, flaked almonds and allow to set.


Thursday, 26 July 2007

Panettone Glassato - Glazed Panettone

Panettone -I loved this as a child and even now, as an adult..I remember Mum buying it when we were kids, mainly around Christmas as it is a traditional Italian Christmas cake...so light and delicious. We were always excited when she would buy this, time to all sit around the table and enjoy a piece, as we listened to her reminisce about when she used to eat it as a little girl in Rome.


for the starter:


1/3 cup milk, lukewarm


1 envelope (7g) active dry yeast


1/2 cup (70g) plain flour


for the dough:


6 Tb (85 g) butter, room temp.


1/2 teaspoon salt


60 g sugar


2 tsp vanilla extract


3 eggs


2 cups (280 gr) flour


60g raisins


60g candied orange peel (I omitted this)


for the glaze:


60g almond meal


60g caster sugar


1 tsp cornstarch


1 egg white


60g flaked almonds


icing sugar, for dusting


Preparing the starter:


In a small bowl, whisk the yeast into the milk.


Stir the yeast mixture into the flour.


Cover the bowl with plastic wrap, and set aside to rise for about 45 minutes. It should triple in volume. I like to use the microwave with door shut...it is kinda like a bakers prover only a mini-version lol...


Preparing the dough:


When the starter is ready, in a mixmaster with a paddle, place butter, salt and sugar. Beat lightly. Add vanilla and beat to combine.


Add one egg and 1/3 of the flour. Beat to incorporate.


Continue adding the eggs one at the time, alternating with the flour.


Beat this compound until smooth.


At this moment the starter will be “spongy”, soft and fluffy. Add the starter to the mixer and beat to incorporate until smooth.


Combine the raisin and candied peel.


Transfer the dough to a buttered bowl. Cover with plastic wrap and set aside to rise until double in volume, for about 2 hours.


When the dough is ready push it with your fist to let the air out.


Transfer the dough to a lightly floured work surface and knead it, folding it on itself several times.


Transfer the dough to a 9 inch buttered spring-form pan. Press the dough lightly toward the edges, to cover the bottom evenly. Cover the pan with plastic wrap and set it aside to rise for about 2 hours. The dough will rise to the edge of the pan.


Preparing the glaze:


Preheat oven 375 F (190 C).


Place the almond meal and sugar in a bowl. Add cornstarch and egg white.


Stir to combine.


Finishing the cake:


When the dough is ready pour the glaze on top.


Spread it evenly on the cake. Don’t press on the surface of the cake to avoid deflating it.


Sprinkle the flaked almonds on the top.


Top evenly with icing sugar.


Bake for about 50 minutes or until the surface is golden and swollen.


Open the side of the pan, running a knife along the edges if necessary.


Transfer to a rack to cool.


The panettone can be stored wrapped tightly in plastic wrap.


Where has the time gone?

WOW I cannot believe it has been so long since I posted here, so I thought it would be an appropriate time for a revamp, open up the curtains and brush away the cobwebs!!...

I have been super busy, cooking still, yes, and loving it as always but just sooooo slack when it comes to bloggin' about it - with the kids keeping me occupied, my busy household and my work from home design thing I have on the boil - well, I don't have much time left for me to blog on! Buuuutttt I am really going to make a stellar effort from now on, you'll see ;) and if I slack off, well I will be hoping you all will gimme a swift kick in the behind lol!

Good to be back ((hugs))

Sunday, 8 April 2007

Our Good Friday Feast

Well this took me a good couple hours to prepare, but oh so worth it - but as it was gobbled up fast, needless to say, I didn't have time to hunt around for the camera to visually document my efforts..so I will attempt to describe my efforts for you.

Firstly, I made an aoili, for those who do not know what this is..it is a mayonnaise loaded with garlic, squeeze of lemon juice and S&P and I let this sit in the fridge to allow all the flavours to infuse and intermingle whilst I prepared the rest of the meal.

Had a few squid tubes, which I cleaned up and then cut into calamari rings, these were then crumbed in breadcrumbs and gently cooked in hot oil until golden and crisp.
Peeled and cut some potatoes into cafe style thick chips, rinsed off excess starch and dried them.
Then I lowered these into the hot oil and cooked until they were crisp and gold on the outside and the insides were fluffy - the perfect chip!

After cooking the chips and draining any excess oil, I tipped them into a large bowl, dredged them in the rosemary salt I made and tossed them until they were coated in this delectably flavoured salt - they were divine - I don't think I could ever go back to regular salted chips!

To make my rosemary salt, I just threw into my mortar and pestle; a fistful of sea salt flakes, a couple branches worth of rosemary and some fresh lemon zest - and just pounded this until it resembled 'green salt'..this is an idea from one of the Jamie Oliver cook books, which one I couldn't tell you, they just seem to all blend into one big book now!

I also served this with the simplest of green salads..some lettuce leaves, herbs, olive oil, sea salt, cracked black pepper and some lemon juice...easyyyyyy and so yummy.

I assembled some calamari rings on the plate and balanced some rosemary salted cafe style chips next to the calamari, with a dollop of the aoili for dipping. Salad was served in a wooden salad bowl in the middle of the table for all to help themselves!..

"Sizzler" Style Toast

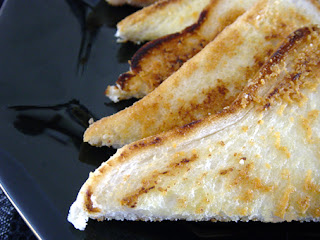
Have always enjoyed that toast you get from Sizzler..so I have recreated it here...turned out nice and golden and was gobbled up by my boys (My big boy and my little boy;) in record time!!!

SOOOOOOO easy and QUICK!


  • 4 slices thick bread
  • 1 Tb butter
  • 2 Tb canola oil
  • 1/2 C grated parmesan cheese
  1. Butter both sides of bread.
  2. Sprinkle the grated parmesan cheese on a plate and press in the buttered bread to coat both sides.
  3. Ensure even coverage.
  4. Heat oil in a pan (ensure pan is well oiled for each piece of bread).
  5. Fry both sides of bread, turning once.
  6. Once golden brown - serve.

Very excited!

I have just been outside rejuventating my vegetable/herb patch..I have just kept it very simple this time around, and planted a whole bunch of red gourmet lettuce, green gourmet lettuce, genovese basil, sweet basil and some chives...My theme is a 'living salad' garden so I can go downstairs and pick my leaves and herbs as needed..

I am hoping to get a bigger area very shortly to grow much more so this will be great, I was growing more at one stage but with the severe water restrictions here in SE QLD well one must be very careful how much water one uses..BUT if I am careful and frugal with my water usage and water at the end of the day when evaporation levels are at their least - we should do OK!

So I was going to add a pic but really who wants to look at a photo of uninteresting dirt? I will wait until there is some action and I will take first snaps of the first signs of growth and every couple of weeks thereafter..WATCH THIS SPACE to see the progress of my living salad bowl!!

Wednesday, 4 April 2007

Hot Cross Buns


I got around to making my hot cross buns today - and after much research, decided to go with the recipe from the BBC..which seems the nicest I have seen.

They say to use lemon zest, but being out of lemons *shock, horror!* I had to use an orange which has worked lovely. I also grinded my own cloves and cinnamon for the 'allspice' and man, did it smell fragrant and heavenly, absolutely divine!

So here is the recipe for the hot cross buns :
And here are the photos of mine I took this afternoon..let me tell you - they are the yummiest, spiciest, fluffiest hot cross bun I HAVE ever eaten - once you try homemade you will never go back to the horrid store bought thing..ughhh yuck!
The recipe yielded 12 so I froze 6 and kept 6 out - hopefully they will last until Sunday!


Monday, 2 April 2007

Nonna's Sugo Di Carne ("Sauce of Meat"/Bolognese)


This is simply the best Bolognese sauce you will ever make. Don't be surprised if people on the street raise their noses in wonder as they pass your kitchen. The aroma in your house will be incredible, so be prepared for total greatness!

I was raised on this food, so many memories surround this meal for me. Now, I am raising my kids on the same food I was raised on - good italian cooking, so this recipe, passed on to me from my Mum, and to her, from her Mum (my Nonna) is being passed on to my kids - they LOVE it, so Grazie Nonna - milione baci per voi! xox

  • 1 kg lean minced beef
  • 1 large brown onion, peeled and diced
  • 2 Tb olive oil 6 cloves of garlic, finely chopped
  • 1 medium carrot, finely chopped
  • 1 medium celery stick, finely chopped
  • 1 C dry white wine (yes, I use white or red, doesn't matter)
  • 2 tins (400g each) whole peeled tomatoes
  • 3 heaped Tb tomato paste
  • 2 C water
  • sea salt and fresh cracked black pepper
  • handful of fresh basil, torn (if you have some)
  1. Chop onions, carrots and celery finely, set aside.
  2. Chop garlic, set aside.
  3. Heat a pan on medium high heat, put in a lug of olive oil and add the chopped vegetables and garlic.
  4. Saute this briefly until the onions turn opaque.
  5. Add mince, break mince up, keep stirring and brown thoroughly.
  6. Add 1 cup of white wine, this will create a wicked sizzle and will deglaze the pan and soften all the flavoursome bits on the bottom of the pan.
  7. Allow it to reduce by approximately half and then add the salt and pepper and tomato paste, letting the tomato paste cook down a little bit.
  8. Add tomatoes and water - put lid on and allow to slowly simmer for 2-3 hours, stirring occassionally.
  9. Just before serving, tear up the fresh basil and stir it through the sauce!
  10. Serve with steaming hot pasta, and a good shaving of parmegiano reggiano..

What the well dressed olive/cocktail is wearing...


Stumbled upon this website the other day, very impressed, what a talented lady and what gorgeous items she is handcrafting and plying on the web..check her items out at:


Absolutely gorgeous and the price, well a bit on the costly scale BUT they are real sterling silver, would last a lifetime and are UNIQUE and INDIVIDUAL! Would make great wedding, engagement, anniversary, 18th or 21st gifts!

Lennon's Salad

Well, I named this simple salad after my 3.5 year old son, Lennon. He just loves this salad and scoffs it down like a little piggy whenever I make it...which can only be a good thing, after all - what is better than seeing your child pigging out on a SALAD???

Nice and healthy and a good alternative to a creamy coleslaw (less calories thats even better!)

  • 1/2 head of cabbage (or 1/4 if it is an extremely BIG one!), finely shredded
  • 1 large carrot, grated
  • 40g chunk of cheese, grated (tasty reduced fat)

Dressing :

  • juice of half a lemon
  • 1/4 C white vinegar
  • olive oil, a few good glugs
  • 1Tb chives, fresh or dried - whatever you have
  • sea salt flakes and freshly ground cracked black pepper
  1. In a bowl, add your shredded cabbage and grated carrot and cheese...
  2. Combine all the dressing ingredients in a clean jar, screw lid on and shake baby shake, then tip this glorious concoction over the willing and ready vegetables.
  3. Toss with your hands and serve - yummmmmm! (Lennon and I just share it straight out of the bowl together, try it, it's fun!)
** This is just a simple version of the salad, but other things we have used before is half green cabbage/half red cabbage..thinly sliced celery...halved cherry tomatoes (red, yellow, tigers whatever)...toasted sesame seeds add an extra dimension too!


Yiouvetsi (Lamb, tomato and risoni bake)

Yiouvetsi is one of several recipes that takes their name from the dish actually used in cooking. The "yiouvetsi" is a large, usually round, deep clay dish. This recipe may be made in any oven-proof baking dish, but clay or earthenware is preferred, as it imparts a delicious, earthy aroma to the stew.

I love this, it is pure comfort food...hope you enjoy it as much as we do~!

  • 1/4 cup olive oil
  • 1 medium sized leg of lamb (1.8kg-2kg))
  • 2 Tb lemon juice
  • salt and pepper to taste
  • 2 tsp greek oregano
  • 2 garlic cloves, peeled and crushed
  • 1 C brown onion, coarsely chopped
  • 1 C water
  • 1/2 C dry red wine
  • 2 C chopped peeled plum tomatoes
  • 2 C low fat beef or chicken stock
  • 2 cups risoni (or orzo) pasta
  • 1 C kefalotiri cheese, grated (if you cannot find this traditional greek cheese, use parmesan or romano)
  1. Preheat the oven to 230c.
  2. Lightly oil a large, deep earthenware baking dish. Place the lamb on a roasting rack inside the dish and rub with 2 tablespoons olive oil, lemon juice, salt, pepper and oregano.
  3. Finely chop the garlic and sprinkle, together with the onions, on top and around the lamb.
  4. Place meat in oven and reduce temperature to 180c.
  5. Roast for 1 hour.
  6. Pour water and wine into roasting pan and continue cooking the meat, basting every 15 minutes, for another hour, or until roasted to desired doneness.
  7. Remove meat to a platter and cover with a tin-foil tent to keep it warm.
  8. About 10 minutes before removing the lamb, bring tomatoes and chicken broth to a boil in a medium-sized saucepan.
  9. Add risoni or orzo and return to a boil.
  10. Just after removing the meat, pour the contents of the pot into the roasting pan, raise temperature to 200c and continue cooking the risoni or orzo for another 25-30 minutes, until tender.
  11. Add water during cooking if necessary. To serve, place risoni or orzo on a large serving bowl with the meat, sliced, in the centre.
  12. Sprinkle pasta with grated cheese and serve.


Thursday, 29 March 2007

Creamy Tuna and Vegetable Pie


So today, I was wondering what to cook for dinner - HAD to be something with tuna because all the meat I have in the freezer has been designated for meals for the rest of the week.

Didn't want to do a boring tuna mornay or any of the usual boring tuna things, so a little light turned on in my head. I was thinking..tuna..sauteed mixed vegetables...cheese...creamy white sauce - all encased in a golden pastry..mmmmm, this might actually work! A creamy tuna and vegetable pie.

Firstly, I knocked together a quick shortcrust pastry (all the recipes to follow) then as it was chilling in the fridge, I got to work with chopping the vegetables, sauteing them and allowing to cool, whilst I prepared the white sauce.

It all came together pretty quickly, though I spent a bit of time waiting for the filling to cool before adding it to the lined pastry pie dish - if the filling is hot, well the butter rich pastry is just going to melt and fall apart, don't want that - so to avoid a disaster, LET IT COOL!

You also need to 'blind' bake the pie crust before adding any filling as this stops the dough from being soggy!

It is a WONDERFUL pie for kids. The vegetables are all hidden by the creamy sauce. I must say my son who is 3.5, absolutely loved it - and I am thrilled he enjoyed it, gives me great satisfaction knowing that I made something he ravaged!

I must make mention, as I am a 'bit o' this, bit o' that' cook' - I will, like always, try to give as accurate measurements as possible!

So, without further ado...lets make a start on this recipe!!!

Sam's Shortcrust Pastry :

  • 2 C Plain Flour
  • 150g butter ( I used canola margarine) - must be very cold, straight from the fridge
  • 1 tsp salt
  • 6-8 Tb chilled water
  1. In a bowl, add your flour. salt and butter (canola margarine) and rub it with your fingertips, until it resembles crumbs.
  2. Cautiously, add chilled water, tablespoon by tablespoon, and using a blunt knife, mix it together using a cutting motion, until it comes together - then get your hands in there and gently knead it to get it all together in a ball.
  3. Pretty easy stuff - then put it in a little plastic bag and chill in the fridge 30 minutes.
Saute your vegetables :
  • 1/2 zucchini, grated or finely diced
  • 1/2 brown onion
  • 2 medium celery stalks, finely diced
  • 1/2 C frozen mixed vegetables (corn kernels, carrot, peas, corn) the one I buy also has cauliflower and broccoli core in it - this is good for 'bulking up' the filling.
  1. Heat a pan on medium heat, when it is hot - add a drizzle of good olive oil,then add the grated zucchini, onion and celery and saute these for around 3-4 minutes, stirring constantly.
  2. Add the cup of frozen vegetables, stir for another 3-4 minutes until done.
  3. Turn off heat and move pot to the back of the stove.
For the White Sauce :
  • 50g butter (I used canola margarine)
  • 50g Plain flour
  • 2 -3/4 C milk
  • 1 Massel Chicken Cube http://www.massel.com.au/products/salt_reduced_cubes.shtml these are what I have been using for years, they're great and far superior to cheapie stock/bouillon cubes plus, they're suitable for vegetarians, yes! CHICKEN FLAVOUR made from vegetables!
  • pinch of sea salt and grind of pepper
  • 425g can of tuna (in brine)
  • 1/2 C grated tasty cheese
  1. Place butter in a pan and melt on medium heat, when bubbling, dump in your plain flour and half the milk, and begin whisking immediately, this will ensure you have a lump free sauce.
  2. Drop in the Massel cube, salt and pepper, keep whisking, until you see the sauce start to thicken.
  3. Add the rest of the milk, continuing to whisk and as it thickens again, add the 1/2 a cup of grated tasty cheese, whisking until it melts.
  4. Drain can of tuna and add to the sauce.
  5. Turn heat off and now add the sauteed vegetables to the white sauce.
  6. Allow the sauce and vegetable mix to cool completely.
Blind baking the pie crust :
  1. Preheat oven to 180c.
  2. Remove pastry from fridge, flour work surface and pull approximately half the pastry off the lump and gently knead a little.
  3. Using a floured rolling pin, roll the dough out in a rough circle shape and to about 6-7mm thickness.
  4. Brush some olive oil in your pie dish, and lay the pastry into the dish, using the overhang to help you adjust the pastry to 'sit right'.
  5. Lift dish up and use a sharp knife to cut off the excess pastry. (Put excess pastry aside - you will have enough filling and pastry to make another pie, one for dinner and one to freeze!)
  6. Rip a piece of baking paper and lay this on the pastry and then proceed to fill and weigh the paper/dough down with either rice or beans - this allow the pastry to cook through without bubbling or rising.
  7. Put it in the oven for 20 minutes, keeping an eye on it, it should be taken out just before it reaches the 'golden brown' stage.
Assembling the pie :
  • OK, begin to fill the pie crust with the cooled vegetable/sauce filling. Fill it to the top.
  • With another piece of pastry, flour your work surface, and using your floured rolling pin - roll out the "lid" of the pie to about 6-7mm.
  • Break an egg into a little bowl and gently whisk, using a pastry brush, paint the egg wash around the rim of the pie crust, so it 'adheres' the crust and the 'lid' together.
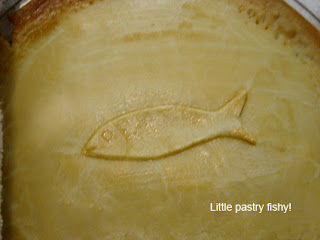
  • Lay the pastry over the filled pie crust, take a fork and and press the edges down and this is purely optional : with some of the excess dough, cut out a shape and lay it on top of the pie.
  • Brush the top of the pie with some of the remaining egg wash.
  • Place in the oven and cook for approximately 30 minutes, keeping an eye on it and taking it out when it is a rich golden brown colour.

I served mine with a side of garlic and chive mashed potatoes and a salad of tomatoes, cucumber, onion and basil, drizzled with olive oil, lemon juice, salt and pepper *just to 'freshen' the palate*.